Monday, April 27, 2009

DIY : Spraying the Flare.

Just a quick update:

Flare had been painted with flat black.

Its new look. Spacer or 15' eh?

Friday, April 24, 2009

Story : Flaring the 808.

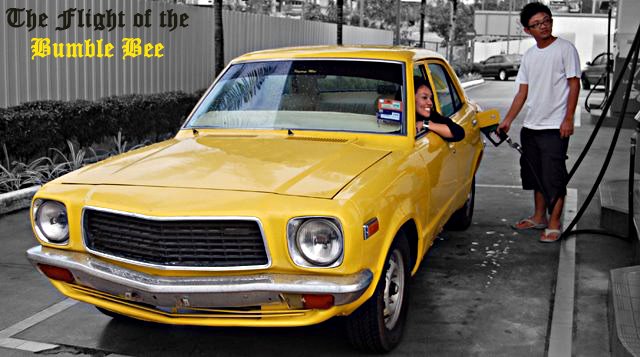
As promised, we went to Play House Garage today to get the sexy flare. Anyway, first of all; since the flare is for Starlet, it surely will not fit 100% if the worker didnt trim it. And for clearance issue, I had to cut the front fender a bit especially the left one, the damaged @ rusty side.


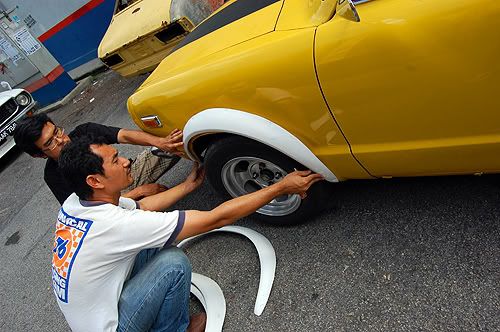
One hour of arguing with the worker (LOL~) and trimming, taraaa, the front fender had been done.

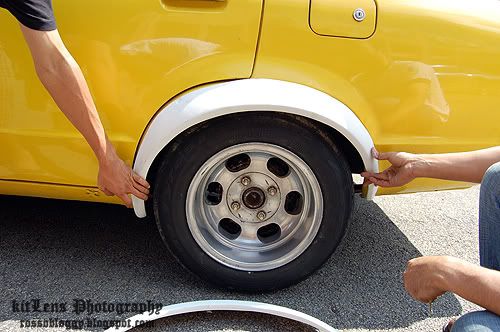
We had some clearance issue on the door for the rear so I decided to cut the fender into two so that half of em will attach to the door.
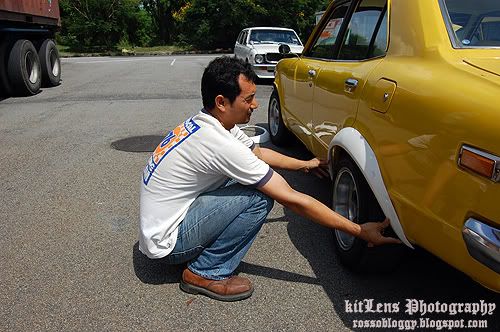
Measuring time:

Done! I am very very satisfied with the job done by Play House Garage. Very neat and almost flawless job.
Some closeup shots of the flare:
Front.

Rear.


Anyway, here's a big project of Play House, a super bad condition Ford Cortina, and in the restoration progress. Roughly the cost of the bodyworks ( a LOT of) is RM8k+/-. And again, Im very impressed with the new floor made by them. It really looks like it was pressed by a machine. All was done by hand actually.

We went to nearby mamak after the job had been done. And guess who's showed today, another 808 user! His name is Fendy and his 808 is in very good condition. Im quite happy to found other 808 user.

His nice 808.

The neat interior compare to mine.

And kinda surprised when he gave me a very meaningful gift, a Mazda horn button! Thanks bro!

And, another gift came from Mok. She bought me a T-shirt! Oh, my lucky day isnt it?

Arrived at our hostel at 11pm. So, rest time!

Thursday, April 23, 2009

DIY : Putting the spacers.

Bought this spacers few days ago. Was thinking of buying the old school spacers but I heard a lot of stories bout it so finally took the normal spacers. Its 8mm thick. Just to make my rear studs can be tighten with normal bolts, that's the reason Im buyin it.

Anyway, Mr.Jaguh Autoworks, check out this U-bolt highlighted in red color. Enough aa to put a few more steel plates of yours? Can be done or not?

Dirty drum brakes. Will repaint it this coming holiday.

Wee, more wider now.

And a preparation for a fender flare, I decided to raise the car a lil more bit so that it will looks more balanced. Will be going to Playhouse Garage tomorrow to fit in the wide fender. Argh, so excited!

My earlier post of Playhouse Garage; the expert in oldschool car bodywork.

And the sexy fender flare.
http://i72.photobucket.com/albums/i178/arm_flip4crew/PlayHouse/DSC_0310copy.jpg

http://i72.photobucket.com/albums/i178/arm_flip4crew/PlayHouse/DSC_0308copy.jpg

http://i72.photobucket.com/albums/i178/arm_flip4crew/PlayHouse/DSC_0309copy.jpg

And my rough idea for Bee is something like this:

Emm, where can I find the front spoiler and the duck tail eh? Looks good on a yellow 808, in this case; its RX-3.

Story : I Cant Stand The Heat Anymore!

Was sleeping till 1pm till Mok called me and ask if Im interested to go to watch Bohsia at cinema with her. Of course if its Mok that is asking, I cannot say No! or else she will be monyok all day. Hehehe. And since Bee had been sleeping for a few days, so we decided to go to Pavillion with Bee. And cleverly driving at 2pm on a big city with the sunlight just up your head and a bonus; Bee doesnt have an aircond yo, its like a moving sauna every time I decided to drive Bee.

Hahahahaha. And Im glad Mok doesnt complaint much bout that. Romantic isnt it dating on a moving sauna? Overall, Bohsia by Shamsul Yusof is better than Evolusi KL Drift. Wayyy much better. The movie reflect the truth about our new generation (that's include my generation too) in KL especially the Mat Rempit.

Anyway, after the movie, we rushed to get out of the city before its jammed or else Bee will overheat as usual. LOL. Another romantic moment if the car broke down somewhere in the KL eh? I suggest to Mok to tinted the rear window just like Din did to his KE70. And since its just RM40, Mok agree with it.

So, off we go to Sato Auto Accesories at Setiawangsa. Initially, I just want to opt 80% tinted for the rear, and the person in charge said why not tinted all the windows, so finally I opt the 50% tinted for all the windows. The reason I chosed the 50% is so that I have less problem with JPJ.

Pimpin' Bee in progress.

Done! This cheap tinted cost me Rm100 and with 2years warranty. Not bad for our Rm100 investment. And finally some privacy whenever Im driving after this.

View from my block. There's my Bee, Getz and Mok's Mok Myvi. Haha.

Monday, April 13, 2009

Story : Bee's Getting Better.

Honestly, kinda lazy to post the updates coz whenever I think bout Bee, I will become nuts for a while What is in my mind? There's a lot of rust on the floor, there's a hole on the firewall, there's a hole on the pillar, there's a leaking on the bonnet, my temp is not regular, my brake is worn, my headlight is dim, and so on.

Maybe I need to relax one whole day and clear my head. Bee should be grateful (and please cost me LESS trouble. Hahaha) coz I really do care bout her. Anyway, some stuffs that I did to ease the pain in my eyes and for her to serve me better.

No more rust on the fender. Was using EverCoat hard putty plus a lot of sanding job. And I sprayed it with yellow too but still look bad. Nevermind, just a temporary coz wide fender coming soon.

And, finally a new brake shoe for the drum brake. Hahaha. The old brake had already detached. Very dangerous. The job was done at Jeembo's Garage.

New shoe; in! Note that the previous owner had changed the PCD of the car. From 110 to 114.3. Thank you Mr. Previous Owner! Also, the stud was changed few months ago to fit in the new rim. And spacer coming soon.

Sicked Bee was looking at me with its sad face. Yes, dont be sad. You will be overhauled soon and a lot of metal surgery coming too.

Friday, April 3, 2009

DIY : Lorry absorber!

Today, I went to Jaguh's house again. To get my new stuff. Taraa.. A pair of 3-tonne lorry absorbers for my rear absorber modification.

APM Shock Absorber.

Less hassle this time when removing the OEM absorber. Jaguh still pissed off anyway. Hahaha. Shown here are the OEM and the lorry absorber. Luckily both are same size and design.

Plug & Play time!

Tigtening all the nuts. The hard part was on the left coz the fuel tanks hose is there too.

And guess what? I decided to remove one of the belts, the compressor belt. Car's feel very nimble now. Much better acceleration. I dont need aircond. :P

Overall, handling does really improves! But, the drawback is the level of comfort is almost '0' by now. I can feel everything that is in the road. LOL~ Urgh. Gotta avoid bad roads by now or else I might have a back pain soon.

Will be putting a lowering block soon~

Again, another great job by Jaguh AutoWorks. Thanks dude~